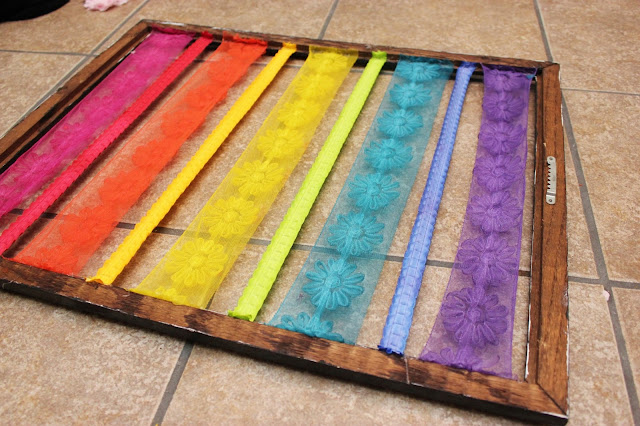
Rainbow Hair Bow Holder Tutorial
I am going all out in my daughter's room with DIY decorations that are budget friendly and very colorful. Like rainbow colorful! I have a quilt in the works, a tutu bed skirt, and a lovely painting planned. I thought I would work on a project that I could finish in a day to make up for all the projects that are laying around waiting to be finished. I get frustrated and like to see results. I colored these ribbons, so you may wish to omit that step. I wanted to make sure they would match her quilt perfectly, and I love dying stuff!
To make this Rainbow Hair Bow Holder, you will need the following materials:
White ribbon if you wish to color your own. If not, ribbon in any color(s) you wish. I used ribbon with lots of texture.
A thrift store frame. Just the frame, no glass or backing.
Dye-Na-Flow Exciter Pack and wax paper (optional). You will not need this is you are buying colored ribbon. I use Dye-Na-Flow because it allows me to apply bold color to whatever fabric I choose, unlike tie dye which only works well on natural materials. Also, Dye-Na-Flow is not actually a dye but a liquid textile paint that simulates dye.
You will also need:
Sandpaper
Gesso
Acrylic paint
Paintbrushed
Glitter (optional)
A sealer for your frame (I like to use Pledge Floor Care because it has no fumes and is a clear acrylic)
A low heat hot glue gun and glue sticks
New hardware if needed for hanging the frame
Step One: Prep your ribbon. Cut your ribbon to the length or width of the frame (depending on which way you want the ribbon to run) plus about 2 or 3 inches to work with. If you are coloring your own ribbon, go ahead and apply the paint now. I use a bowl when applying the Dye-Na-Flow so I don't make a mess, and so I don't waste a bunch of paint.
When you are finished coloring the ribbon, lay it out on wax paper until it is dry.
Dye-Na-Flow needs to be heat set, so once it dries put it in the drier for about 10 minutes on medium heat.
Step Two: Prep your frame. Make sure you remove all the staples and unwanted hardware from your frame, then give it a light sanding to give your surface tooth for the paint to adhere to. Gesso the frame (this is important - priming the frame will help your paint stay on the surface.
Step Three: Paint your frame and add glitter if you wish. I painted my frame with black acrylic paint a bit at a time. I added glitter to the wet paint as I went along so I didn't have to glue it on.
Step Four: Apply Your Ribbons. Plug up your glue gun. While you are waiting for it to heat up flip your frame over and align your ribbon.
Glue all the ribbon down on one side. You may wish to use a tool like a knife or bone folder to press your ribbon against the frame because the glue can leak through the ribbon to your fingers. I like using my hands so I make sure to use a low heat glue gun.
Straighten your ribbon back out and glue the other side down.
Now you can trim the excess ribbon off and hang your frame!
Lula's hair bow holder hanging in her room. She approves.
And here it is with some of her bows on it. By the time I get all the bows up you probably won't even be able to see all the hard work I put into it. Oh well!!!


No comments:
Post a Comment