Stop by my YouTube Channel and take a peek at my video, Art Studio Tour, for a quick peek around my studio. I'm just gonna warn you, I'm from Alabama, and despite my best efforts I do sound quite "country" or Southern!
Showing posts with label art room. Show all posts
Showing posts with label art room. Show all posts
8.25.2014
8.14.2014
Art Nest - Progress
These were all pulled from Instagram, and were taken on my phone, so the photos are not very good. But I thought you guys might like to see some of the progress I have made in my building. If you didn't see the before, check it out here. It's come a long way! Above is my space with furniture moved in, before I brought all my supplies in to sort them.
Here's a shot of one of the peg boards I put up. I don't have sheet rock, and the panels are very thin, so I didn't have anything to hang paintings on. I went to Lowe's and bought two pegboards, had them trimmed down, and painted them white. Now I can rotate my art out and hang some of my tools too.
My hoots! They have moved since this picture.
My table with nothing on it. I prefer it this way, lots of room to work. It's junked up at the moment.
I actually moved this cool dress form out and put it back in my house. It is awesome, but I really don't have the space for it in my tiny little nest.
Bring in the junk! I brought a lot of supplies and tools and stuff in to sort. Boy I sure did have a mess for about a week in there!!!
I had another pegboard and put it up here so I could hang this cool display case. I'll probably store some finished pieces in here.
Stuff on my desk. I thought I would like having things on my desk, but I really don't. Now I have to figure out where I will put all of this.
Storage containers dressed up a bit and labeled. I really like how they turned out!
I like this little corner! There's not much room in here, so getting a good picture is kinda tough.
This corner needs work! I'll be taking out that little table to the far left, moving everything over, and putting in a roll cart to hold my kiln and the items on my desk. I'm in the process of painting that dollhouse. It was mine when I was a little girl, but it got very rusted and scratched up and needed to be repainted. Not sure what I will do with it yet.
Here's my kiln on it's temporary table. I love being able to use this any time I want!
Thanks for taking a little peek into my artsy world! If you want to keep an eye on updates between posts, follow me on Instagram. Later!
1.26.2013
Art Room Chalkboard - Pinterest Inspired
Thanks, Pinterest, for keeping me busy. Like I had nothing better to do. Okay, nothing really better to do, but I have lots of laundry and housework that needs to be done. Instead of working on my chores I am surfing Pinterest boards and working on pins. Here is an good example. I have seen tons of pins on how to make your own chalkboard, whatever color you want. I first spied this project on Design Sponge. It was in a DIY post called Bonnie's Chalkboard Planting Pots.
I kept seeing DIY chalkboard pins on my Pinterest feed, so I had to make my own. I used acrylic craft paints to make my board and mixed several colors to add layers. This is how my board started out.
I didn't like it plain so I stenciled some citron colored paint over that layer with punchinella. Much better. To frame the board I decided to paint something bold in black and white. Here's the coat of white with a little note-to-self written in chalk. I had to test it out!
Work in progress of my detail trim work in black and white. I used latex paint to do the black and white flower frame. I got a little farther than this and decided to call it quits for a few days, which turned into a few weeks. Then I couldn't remember why I stopped but knew I didn't feel up to doing it.
I put a movie in a few days ago and got back to it. Hubby kept asking when I would finish it. When I got started working I remembered why I stopped - it was literally a pain in the neck, and my back. I am so short and I had to use a step stool just to stand on my tippy toes and paint. And I had to bend over to finish the bottom part.
Whine, whine, whine, complain, blah blah. I finished it and here it is. It was worth it and I am so glad to have it done. By the way, my couch is never this clean. It usually holds the laundry I put off doing for days at a time. When it's not covered in laundry, it is covered with tons of toys.
10.26.2012
Chalkboard Desk
I've had this really great desk for a while now. Hubby got it for me at a local thrift store, and I adore it. It have lots of work area and storage. We just redid our floors in my craft room and our kitchen, so I decided this ol' girl needed a paint job. I knew I wanted to use black paint, and I thought a chalkboard top would be great for me and my little girl. I made my own chalkboard paint using this tutorial from Emma and Elsie at A Beautiful Mess. It's super easy, just add 2 tablespoons unsanded grout to 1 cup of paint. I used latex paint, but you can also use craft paints.
Here's a before picture of my desk...
And here it is after painting...
I made the curtain from an old bed skirt. As you can see in the next picture, Lula approves of the updates. She has drawn on it for the last two days. And if Lula is happy, then Mommy is happy.
I'm also working on a mural in my art room, and I plan on posting some pictures of it soon.
4.22.2012
My Art Room Light
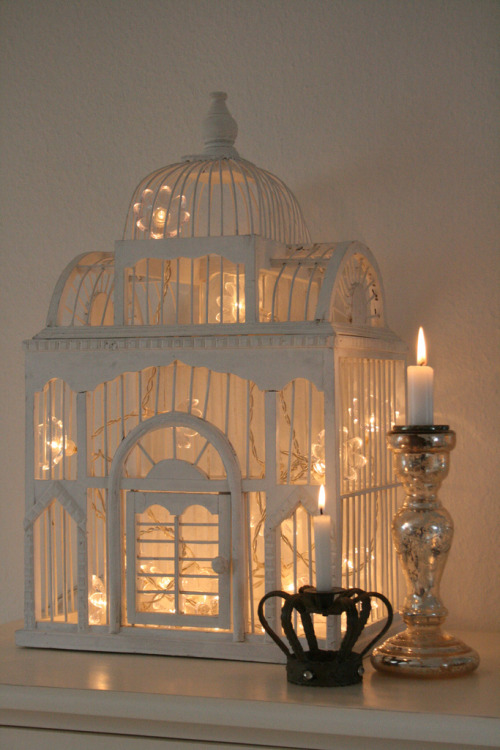
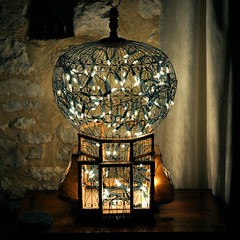
I found a really cool birdcage in the thrift store a few months back. I knew I wanted it somewhere in my art room, but had no idea what to do with it until I saw some really cool photos on Pinterest. Here's what I found.....
So of course I fell in love with the idea of turning a birdcage into a light and had to have one myself. I bought some lights at Hobby Lobby, painted my birdcage pink, and wired the lights inside. I wanted bright white light and did not notice when I got these that they are color changing lights, but now I really like the green and blue of these lights. The pink paint I used is Rust-oleum American Accents Gloss Berry Pink; I got it at K-Mart.
I also put a pegboard up in my room yesterday.
When I get my desk cleaned off again I will post a picture of the whole room. I think I have figured out what to do with my sewing desk now as well, so I hope to have it done before Grayson gets here. My baby boy will be born in 8 days!!!! So it may be a while before I post again.
Labels:
art room,
art room decor,
birdcage,
birdcage light,
budget craft room,
light,
pegboard
3.03.2012
My Sewing Desk - Work In Progress
I am so happy so far with the way my desk is turning out. I still plan on adding layers of color and design, but here are some peeks on the progress so far.
Primed and front panel painted. I just sanded the surface enough to give it tooth and then primed it with gesso. I am going with a prism color scheme here so all my paints and supplies will look nice with it. I love color!!!!
From this point I plan on adding a bit more detail with color, then doing an overpainting of black and white patterns. I have no idea how this is going to turn out though. I am having a great time just painting with no plan. For now this guy is unfinished, but when i get the painting done I plan on adding a couple of layers of gloss to bring out the color.
Primed and front panel painted. I just sanded the surface enough to give it tooth and then primed it with gesso. I am going with a prism color scheme here so all my paints and supplies will look nice with it. I love color!!!!
Now a couple of pictures with the first layer finished.
Some more detail and color added.
From this point I plan on adding a bit more detail with color, then doing an overpainting of black and white patterns. I have no idea how this is going to turn out though. I am having a great time just painting with no plan. For now this guy is unfinished, but when i get the painting done I plan on adding a couple of layers of gloss to bring out the color.
Subscribe to:
Posts (Atom)


.jpg)
.jpg)
.jpg)
.jpg)
.jpg)